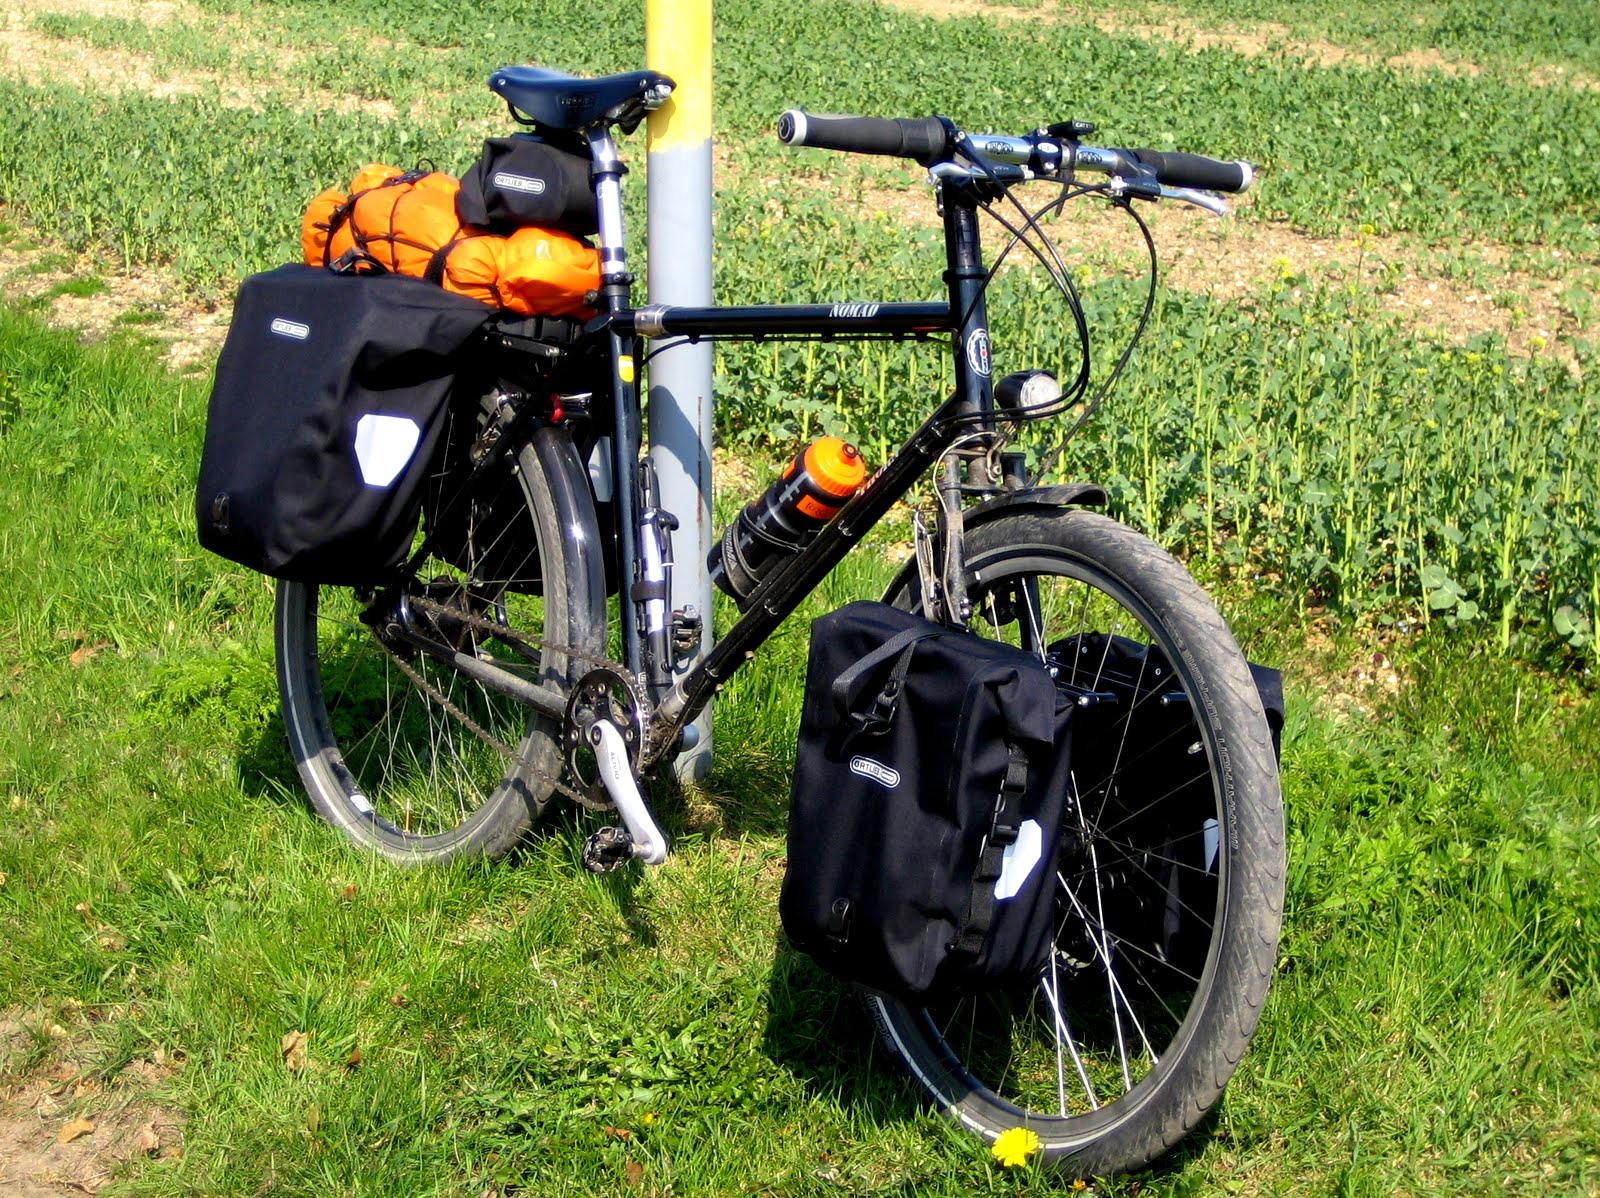
Tuesday, 27 April 2010

5 Day Mini-Tour

Day 1 - To Reading (110 km)

The weather was perfect as I set off on my 5 day mini-tour with virtually full Canada kit; beautiful spring sunshine, temperature just right and a very light tailwind! I made good progress heading towards the Chilterns.

Narrow boats at Marsworth

At Marsworth I stopped at the canal bridge and admired the colourful narrow boats moored into the distance. Soon after, I took lunch at the garden centre cafe in nearby Wilstone. Great food to refuel with and time to rest and soak up the sun!

Under the canal bridge

After lunch, I rode parallel to the Chiltern escarpment, before finally climbing steeply at Kingston Blount. Crawler gear 1 was engaged for the first time since getting the Nomad last year. Then again, it's the first 17% gradient I've attempted with a bike weighing nearly 40kg! I made it up easily enough.

Good refuelling is essential...

I needed more food after that and sat just off the fairway at Nuffield's golf course. This was not the smartest move, as the golfers were terrible! Slices and hooks galore, huge divots flying everywhere, golf balls clattering in trees, shouts of "fore", protracted searching in bushes and hedges. I moved on.

...so is resting after lunch

The landscape was wonderfully wooded and tranquil as I rode down the Chiltern "dip slope" - a mostly gentle downhill for the next 10km - until the final steep drop down to Pangbourne and the River Thames. Not too far to go now and I soon arrived at my aunt and uncle's house.

Christmas Common in the Chilterns

Day 2 - To Chandler's Ford (90 km)

Another perfect day weatherwise. Clear blue skies again! Today I headed south from Reading towards my sister's house in Chandler's Ford. I cycled on many little lanes throughout the day, the sun lighting up the new leaved trees and casting intricate shadows onto the road.

Climbing up Watership Down

The morning's highlight was climbing Watership Down (the rabbit's destination in the famous book by Richard Adams). After a brief but tough climb, I was treated to a long descent towards Whitchurch.

At the top of Watership Down

At Whitchurch I had a quick photo stop at the Silk Mill, before pressing on for lunch at the White Lion in Wherwell. As yesterday, I had a fine lunch followed by a fine soak in the sun. (You've got to make the most of the sun in the UK).

Silk Mill, Whitchurch

When I finally got back on the road, I continued riding through the very pictureseque Test Valley with it's multitude of gentle slow flowing rivers and very pretty "chocolate box" villages.

River in the Test Valley

Reluctantly turning away from the valley, the run in to Chandler's Ford was tiring over the hills, but I twiddled away in a low gear and savoured the scenery and sun, before finally arriving at my sister's house mid-afternoon.

Very calming...

Day 3 - Day Off

Well I don't want to start off too heavily, do I? Anyway, I was quite worn out by two nephews aged 4 and 2...

Day 4 - Back to Reading (90 km)

The day dawned a bit rainy, but it was clearing up when I left. The air was damp and muggy as a climbed a number of short sharp hills heading east of Winchester. After an hour, I crossed the River Itchen at Ovington and entered New Alresford. I had planned to drop into the Watercress Line station to use the cafe, but there was an even more enticing bakery open on the approach road!

Church of St Mary the Virgin, Preston Candover

After tea and cakes (plural), I turned north and rode through the lovely rolling farmland of the Candovers and Axford, before arriving at Oakley where very good friends of mine live. As hospitable as always, Ken and Barbara plied me with fine food and drink as we caught up with each other's recent happenings and future plans.

Rape field.  Aitchoo...

Good luck with your Magnificat Sportive (sponsored by Verenti) on the 13th June. Sorry I won't be around to drive the van this year!

From Oakley, it was a short ride back to Reading on very familiar roads. A bit of a tail-wind helped with the average speed again.

Day 5 - Back home (110 km)

One more day to go on my first mini-tour with full luggage! I mostly retraced my outward route, which meant a long climb back to Christmas Common at the top of the Chilterns. Just before, at Nuffield, I checked out the golfing action again to see if they'd improved at all. Nope.

Cray's Pond

The hill I'd crawled up in first gear a couple of days ago now provided a thrilling descent. Now I know why heavy riders enjoy downhills so much. Saying that, on that hill even with the extra ballast, the Nomad was still not as fast as a racing bike.

Beacon Hill, Ivinghoe

Just to add a bit of spice to the return journey, I did a few miles off-road on a mixture of a rutted bye-way and some field margin. It was a bit bumpy because I didn't bother reducing my tyre pressures but it was enjoyable to be completely away from the traffic. I might have to explore this off-road business a bit more some day...

Bumpy field margin

I made it home safely and I was pretty satisfied with my first trial tour. The Nomad was faultless. My pannier packing needs some refinement to stop me hunting for things, but I'll soon nail that down. I found the riding (about 400km @ 21km/h) straightforward fitness-wise, but I still have minor issues with my saddle occasionally (and randomly) bruising my sit-bones and some mild hot spots from my shoes, although this has improved greatly since I changed to another pair that are stiffer soled.

Some more off-road. Hardcore!

So then, I'm happy and confident about the Canada trip from a cycling point of view. The next task is a camping trip where I can test my tent erecting skills, my one pot calorie replenishment skills, my amusing myself in the evening in a field skills and my ability to survive a couple of days possibly without a shower or electricity.

Sunday, 18 April 2010

Initial Review: Click-Stand Max

I used my Click-Stand® Max for the first time this weekend. I was impressed with the product's functionality, ease of use and the simplicity of it's design.

Click-Stand Max - Portable stand for a loaded touring bike

A loaded touring bike is often very heavy and especially cumbersome when stationary. It is certainly beneficial to be able to keep the bike upright and stable while you load and unload it. A suitable wall or fence is not always conveniently available to prop the bike against, so usually some sort of kickstand (propstand) is used.

Traditional kickstands generally have a poor reputation. They normally attach to the bike's chainstays and the combination of a usually lightweight arm (or arms) and the low positioning below the bike's centre of gravity leaves the bike vulnerable to toppling, especially when heavily loaded. Sometimes chainstays are even damaged when using a kickstand, either from the clamping mechanism, the forces going through the kickstand while it's holding up the bike or as a result of the bike toppling over.

Four piece folding Click-Stand

Some frame manufacturers don't like kickstands very much because of the potential for damaging the frame, even through apparent normal use. Thorn, perhaps deliberately, don't provide a kickstand fixing plate between the chainstays of their bikes and they specifically state the frame's warranty is invalidated if you use certain kickstand models! (E.g. Pletscher ESGE KS11 Twin-Leg Propstand). This was enough incentive for me to look around for something different.

The Click-Stand is a clever bit of 'blue sky' thinking that solves the short-comings of a traditional kickstand. It is made of lightweight holllow aluminium tubing, very similar to that used in modern folding tent-poles and comes in either 4 or 5 sections. The sections are connected with an elastic cord which allows the Click-Stand to fold and unfold very neatly. The top of the Click-Stand has a U-shaped plastic attachment which supports the bike underneath the top-tube.

Closeup of U-shaped Click-Stand support

Click-Stands come in various tube widths depending on the application. I've gone for the heavy-duty Click-Stand Max which is suitable for loaded touring bikes and tandems. It is made from 11mm (.433") diameter Easton tubing. My Click-Stand weighs 125g which is significantly lighter than a traditional kickstand.

Each Click-Stand is custom sized. You specify at the time of order your bike's vertical standing height at the top-tube/seat-tube interface and the top-tube diameter. It folds up to about 20-25cm and two optional brackets are available to store it, either by the side of a water-bottle holder or inline.

Brake-Band used to pull the brake lever and lock the wheel

The secret of the Click-Stand's design is the Brake-Bands® that are supplied with the product. These strong elastic bands slip over the handlebar ends and are used to engage both brakes. This locks both wheels and when the Click-Stand is propped under the bike's top-tube, a very stable tripod is created. The Click-Stand attachment point also benefits from being above the bike's centre of gravity. This helps immensely with stability. It's simple physics.

So how does it perform in practice? Pretty well actually...

Conveniently folded and stored on the rear rack

Once the Click-Stand is engaged, the bike is remarkably stable. It can't be rocked or moved by pushing the bike in the direction of the Click-Stand and it's almost impossible for it to topple over, even if the front wheel swings around. It's also easily stable enough to load and unload panniers one at a time.

Saying that, the Click-Stand is not as easy as a traditional kickstand to use. You can't just get off the bike and flick the stand. I deploy the Click-Stand by first putting the bike in position and then Brake-Band both levers (the bands live close at hand attached to my handlebars). I unfold the Click-Stand (strapped to the top of my rack) and prop it under the Nomad's top-tube, leaning it about 30cm away from the bike (either side can be used).

Click-Stand - A simple and effective product

The Click-Stand works best on hard surfaces. For softer surfaces like mud and grass, the Click-Stand might dig into the ground and this could pose a problem (as it would a traditional one-legged kickstand, only more so). You could put a stone underneath the Click-Stand to prevent this. I think I'm just going to carry a small plastic bottle cap.

The only potential downside I can envisage is if you badly position the Click-Stand or the Click-Stand is accidently knocked, resulting in the (heavy touring) bike falling on top of it. Since it is semi-captive underneath the bike's top-tube, it could well get bent or crushed in the fall as the lightweight tubing is only really strong in one direction.

In summary, I like the Click-Stand®. It's a simple and effective product. It's keenly priced too. If you're in the market for a kickstand for your touring bike, I recommend you add the Click-Stand Max to your shortlist.

Nomad Fully Loaded!

I went for my first ride today with the Nomad fully loaded! After spending an hour fitting the racks and panniers, I spent another hour fettling the setup to eliminate all the annoying rattles...

Nomad with nearly all of the Canada luggage

Then I loaded up! The contents of my panniers were 20 volumes of the beautifully illustrated TimeLife Books: "Voyage Through The Universe". Each volume weighed a very healthy 800g. I also strapped my tent to the rack top for good measure. I weighed the bike and it came to 40kg! Hopefully, this is representative of my 'riding weight' as it's matched to the Draft Kit List I made a while back.

I attempted to wheel the bike out of my house. I could hardly lift it over the front step it was so heavy! (I only weigh 68kg and I have a typical 'racing snake' build; strong legs, strong core, pathetic upper body strength). With some trepidation, I climbed aboard and wobbled off down the road...

Ortlieb Roller Plus panniers front and back...

To be fair, it didn't take very long to get used to the new handling characteristics. The Nomad was designed specifically for this task and it was still a very stable bike to ride even loaded up like this. Apart from the slower steering, which made me watch the road a little more carefully to plan ahead for pothole avoidance (you can't really 'flick' the steering to avoid things at close range), it was pretty much the same as when unloaded: rock solid and undramatic.

I was slower climbing hills, of course, but I was repeatedly amazed at the mechanical advanatge of bicycle gearing which allowed me to pedal to the top of each hill, with moderate effort, a bike I could hardly lift off the ground! I might have been slower up the hills, but the extra ballast provided faster downhills in compensation! I was especially impressed with the stopping power of the Shimano XTR V-Brake / Swissstop Blue pad / Rigida CSS rim combination. The braking was immense, reliable and dependable.

...and a 22L compression dry sac containing my tent

I wrote a post (It's Harder Riding a Touring Bike) in which I calculated some travelling speeds for my Seven racing bike, the Nomad unloaded and the Nomad loaded for my estimated average sustainable power output. I predicted that I could ride the Nomad (40kg version) at about 21 km/h average. No fibbing, my average for the 70 klicks trip today (reasonable pace on rural roads with some rolling hills but nothing steep or nasty) was 20.8 km/h. I love it when a plan comes together.

All in all, an excellent first test ride fully loaded! The Nomad was great. I'm going to ride to my sister's house next weekend. This will be a four day trip and my first mini-tour!